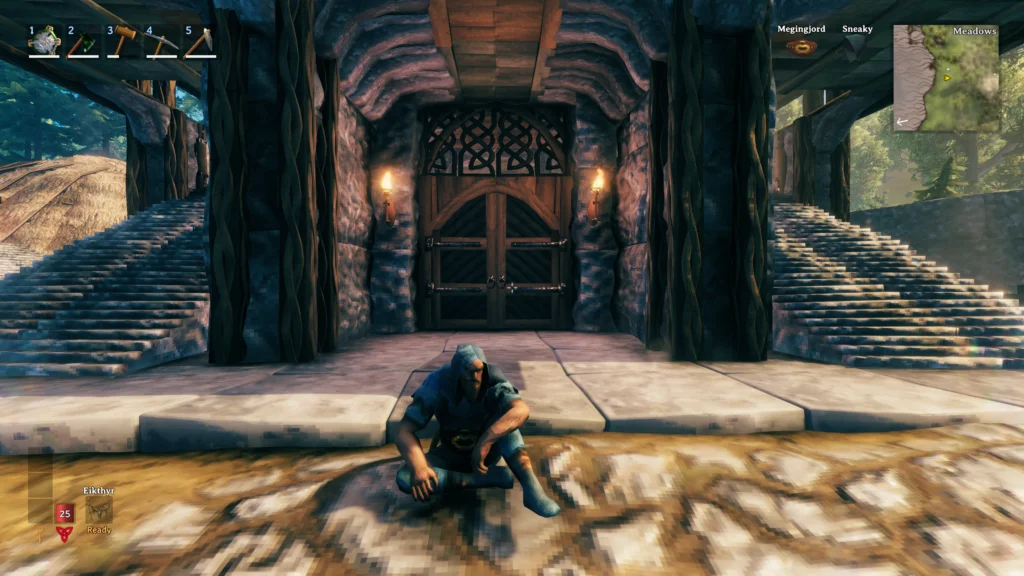
For the past week I’ve been dreaming up a new build to fill a large, lonely plot of empty space in my favorite Valheim base. I wanted something roomy, with a basement where I could set up a combat arena for PvP with my Viking pals. I also however wanted somewhere to enjoy lavish long-table feasts fit for Odin himself! “What if I bridged these two ideas” – I thought. Why not have dinner and a show? It was then that I set to out to build this epic viking longhouse complete with a cage fighting dungeon and Jabba’s palace style viewing platform where hungry dinner guests could watch a death match below as they graze on their Lox Meat pies and Muckshakes.
Creative Mode Building Tips
If you are new to building in creative mode, or just want some tips in general to make your building process as painless as possible, consider these tips!
- Save often! As you'll learn in the end of this build, after completing it my save corrupted and I lost everything. Do not repeat my mistakes. Manually force saves often with the dev console command "save" - you won't be sorry that you did.
- To activate creative mode, you will first need to right click on Valheim in Steam, click "Launch Options" and type in "-console" in the text field, then launch the game. Once in game, open up the Dev Console by hitting Function F5 and enter "devcommands". Dev commands will set to "true" at which point you can enter "debugmode", this will activate creative mode! Now you can press B to toggle resource-free building and Z for flying.
- Remember that building still costs stamina even in creative mode. Spawn yourself some bread, turnip soup or carrot soups by typing "Spawn" followed by an item name and number, for example "spawn bread 50" and keep these on hand to keep your stamina at max.
- At any given time, you can type in "tod .4" to set the time of day to Noon, so you can enjoy the daylight throughout your build.
- SAVE OFTEN - I can't stress this enough, do not trust auto-saves.
In this tutorial I will walk you through my build step by step so you can enjoy your very own viking long-house! Warning, this build initially took me 9 hours to complete, although that was a first-take so I worked out a lot of the structural and design challenges that you can now enjoy the spoils of. That being said, you should expect to spend roughly 4 hours on this build, depending on your building speed. This is recommended to be a creative mode build, due to the sheer requirement of resources and the heights of this structure.
Let’s get started
#1 Lay a Foundation
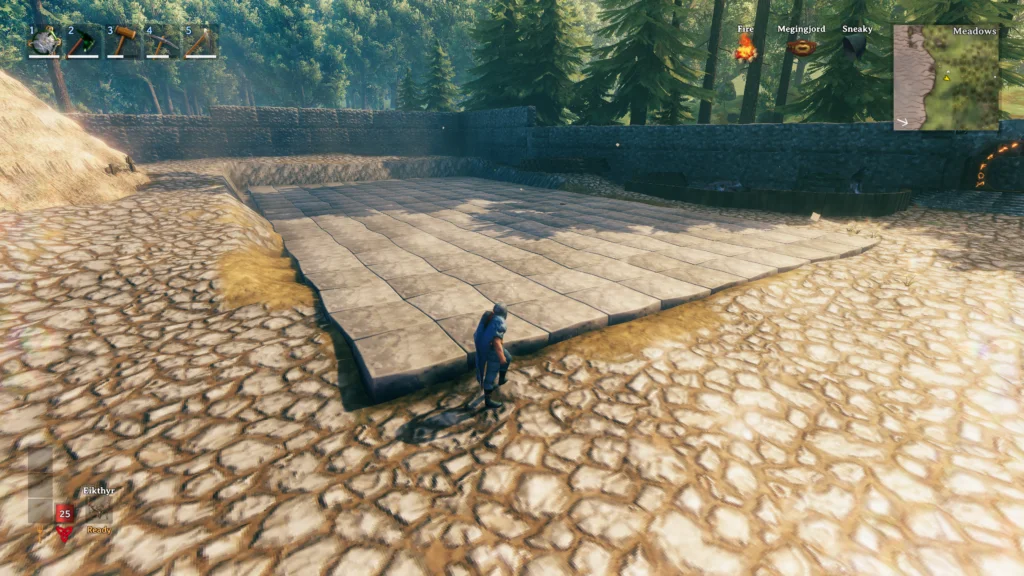
You will need to start by flattening an area of 20 x 11 (in stone floor pieces), then filling it with said stone floors. I would recommend building on an area with a slight hill to allow for a partial underground basement which is a neat added affect, although totally optional.
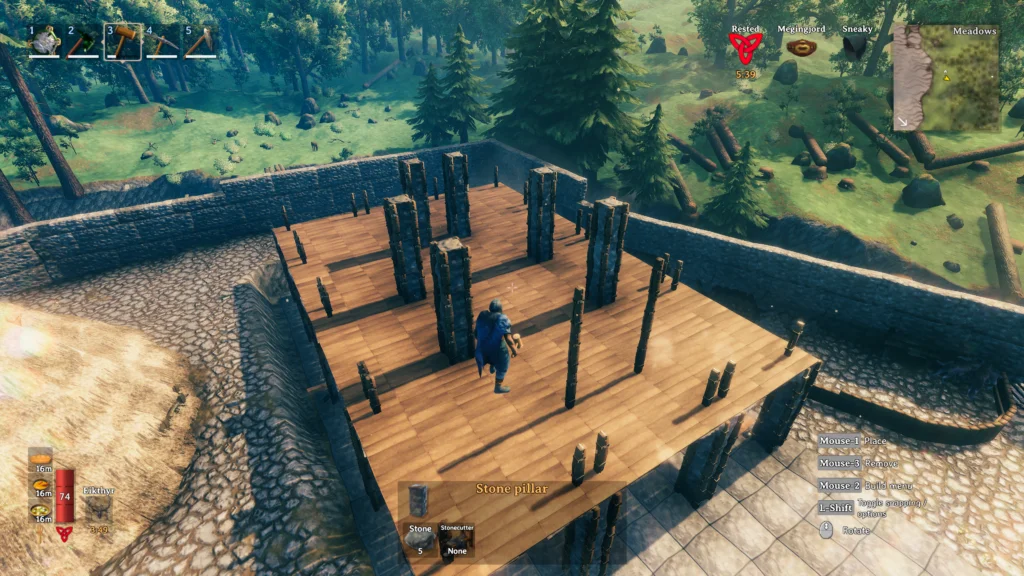
#2 Set Structural Pillars


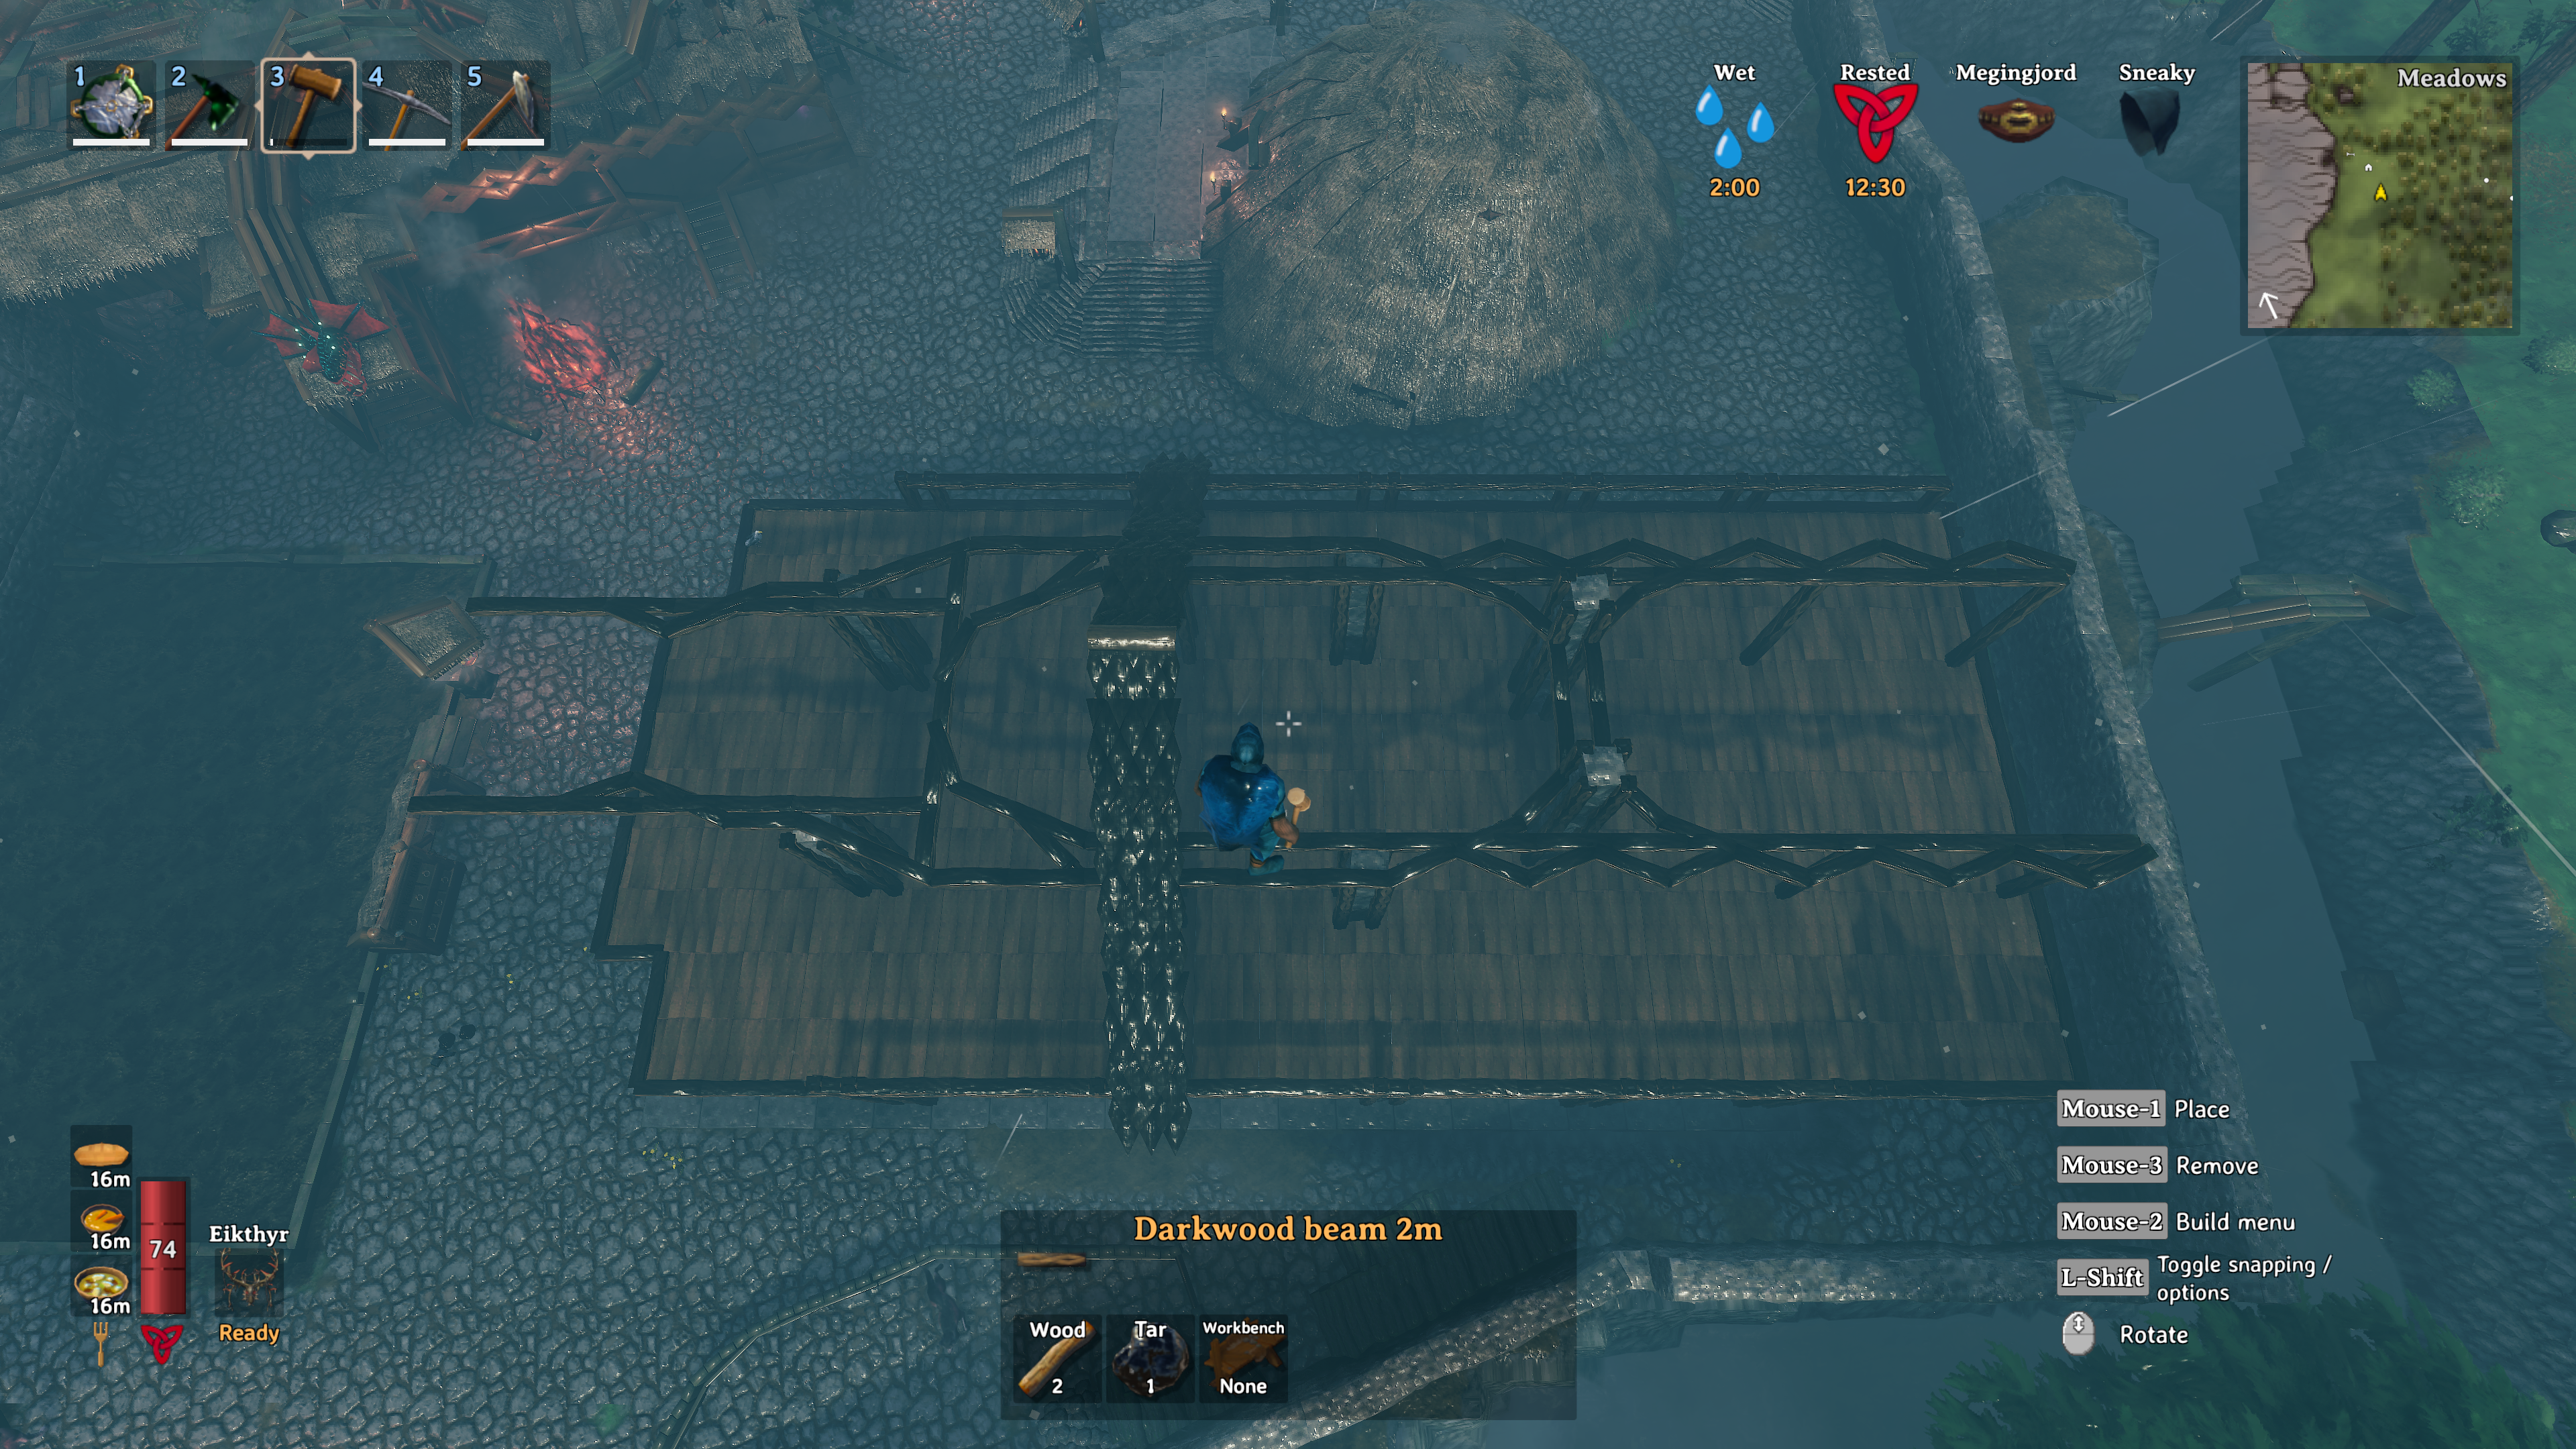
Now you will set down some stone pillars! The birds eye view image will give you the setting pattern. Please note the adjustment in red highlight, you’ll want to set the stone pillars in the squares that I’ve indicated. Despite the photos indicating 2, build your pillars three high, then set Iron poles on all 4 sides, 3 high for each pillar. This will ensure that our second floor has full structural stability.
#3 Add Arches and Floors


Place arches at the top of every pillar, on all inward facing sides. Next, snap wooden floors all the way across the top. When complete, you should have very few if not any wooden floors that are less than Blue structural integrity (The color they appear when hovered over with your hammer).
#4 Extend Pillars Through Floor
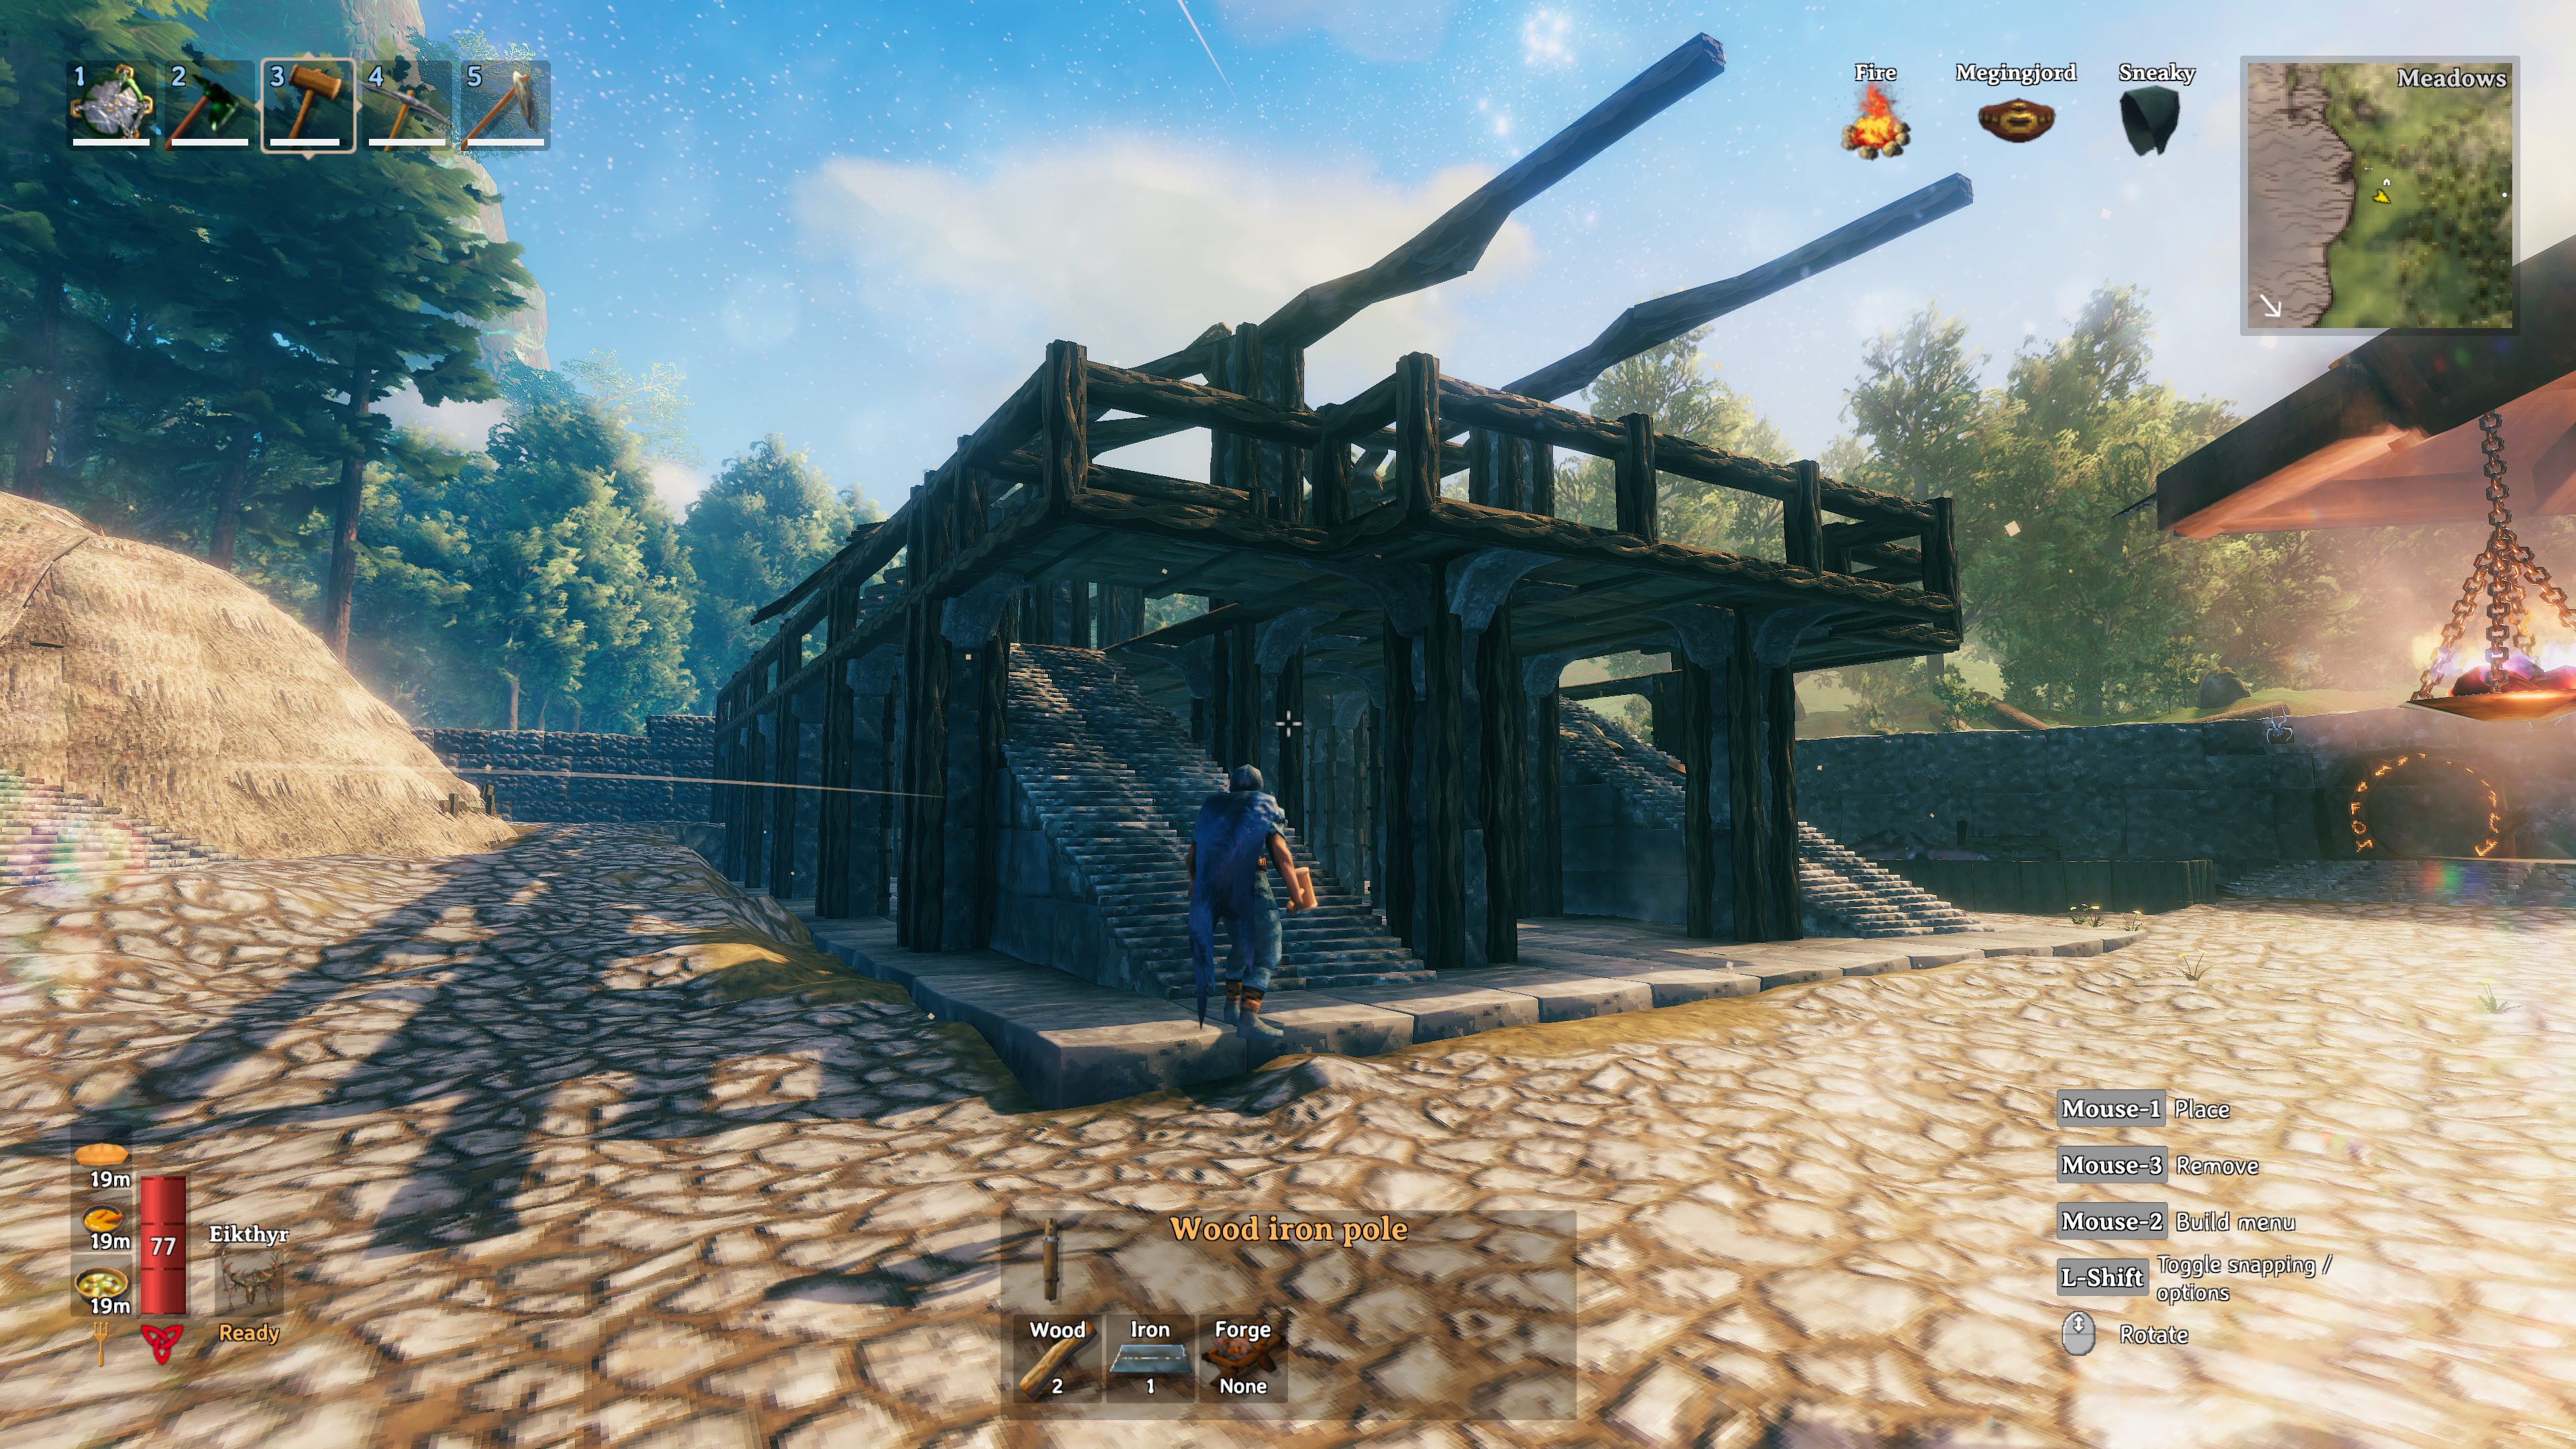
Extend the inner most two Iron poles from the perimeter pillars. Then, extend the 6 central pillars 3 high above the wood level and brace them with iron poles. The front two pillars need only be raised with Iron Poles, as seen in the photo above.
#5 Extend Roof Supports and Install Rafters
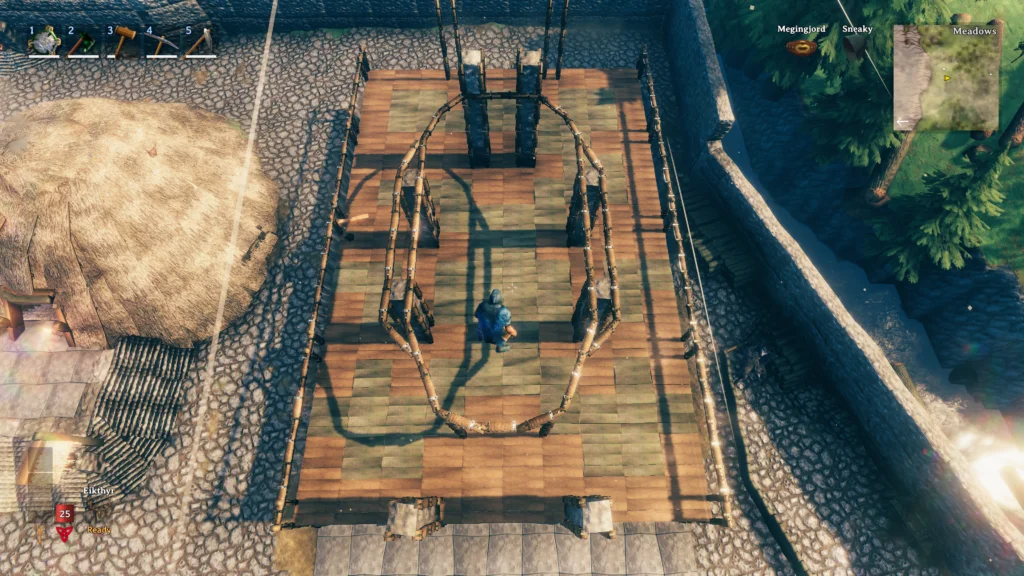
Install Iron Beams all the way across the longest sides of the building. Make sure to snap the horizontal beams slightly lower than the top of the vertical poles, so the tops poke through a bit. Zoom into the photo above to see what I mean. For the rafters, you’ll need to do some clever snapping and shift-hold placements to get the pattern matching what I have here. The structural integrity may appear green or yellow at this point, but we’ll be fixing that soon!
#6 Extend Decks, Reinforce Beams + Poles


Time for some reinforcement! You’ll now need to snap on Dark Wood Beams and poles over top all Wood Iron Poles and Beams, except for those that are facing inwards on the basement floor. You can use 2m and 4m beams as you see fit. This will upgrade the structural integrity from green, to blue which is the most stable we can get.
Now you’ll need to extend the back deck by one 2m and one 4m Dark Wood Beam, then place two Stone Pillars in the same fashion as the rest, the number of pillars will depend where your ground level is here. place arches as supports for the wood floors, then fill in the space with flooring to square up to the rest of the platform. Repeat on both sides, then carry your rafter beams out to the end of your deck, and erect one Darkwood Pole as support on the end. This will eventually be our roof support.
On the front end, you’ll need to erect two new stone pillars in the same fashion as the rest, the placement of which you can see in the second photo above. Now you’ll need to finish this up with a few specially placed beams in order to support our roof correctly, so pay close attention to the design in the third image above and make sure your roof looks like this from a birds eye view before continuing!
Don’t worry about adding the roofing yet, this is just here at this point as a guideline, you’ll be adding that soon enough.
#7 Construct Front Stairs

Start your stairs one length of stone floor in from the perimeter of your foundation, two wide, all the way up until you meet the level of your second floor. Stack Stone Floor pieces under the stairs as you go up for supports. Open up the floor just enough to allow you to walk up the stairs without getting the horns of your Drake Helmet stuck in the ceiling on your way up – no one wants that…. it’s embarrassing…
Rinse and repeat on the other side and you’ll have your way up to the second floor complete. Now walk around to the back of your staircase, and carefully knock out some of the bottom stone floors while immediately replacing them with stone arches, in the pattern you see in the photo above. This will allow crucial pass-through space for the walkway we’ll be installing later. Plus, it looks cool. Additionally, brace the outer corners with Wood Iron Poles for stability. Repeat on the other side.
#8 Fill In Walls And Let There Be Light
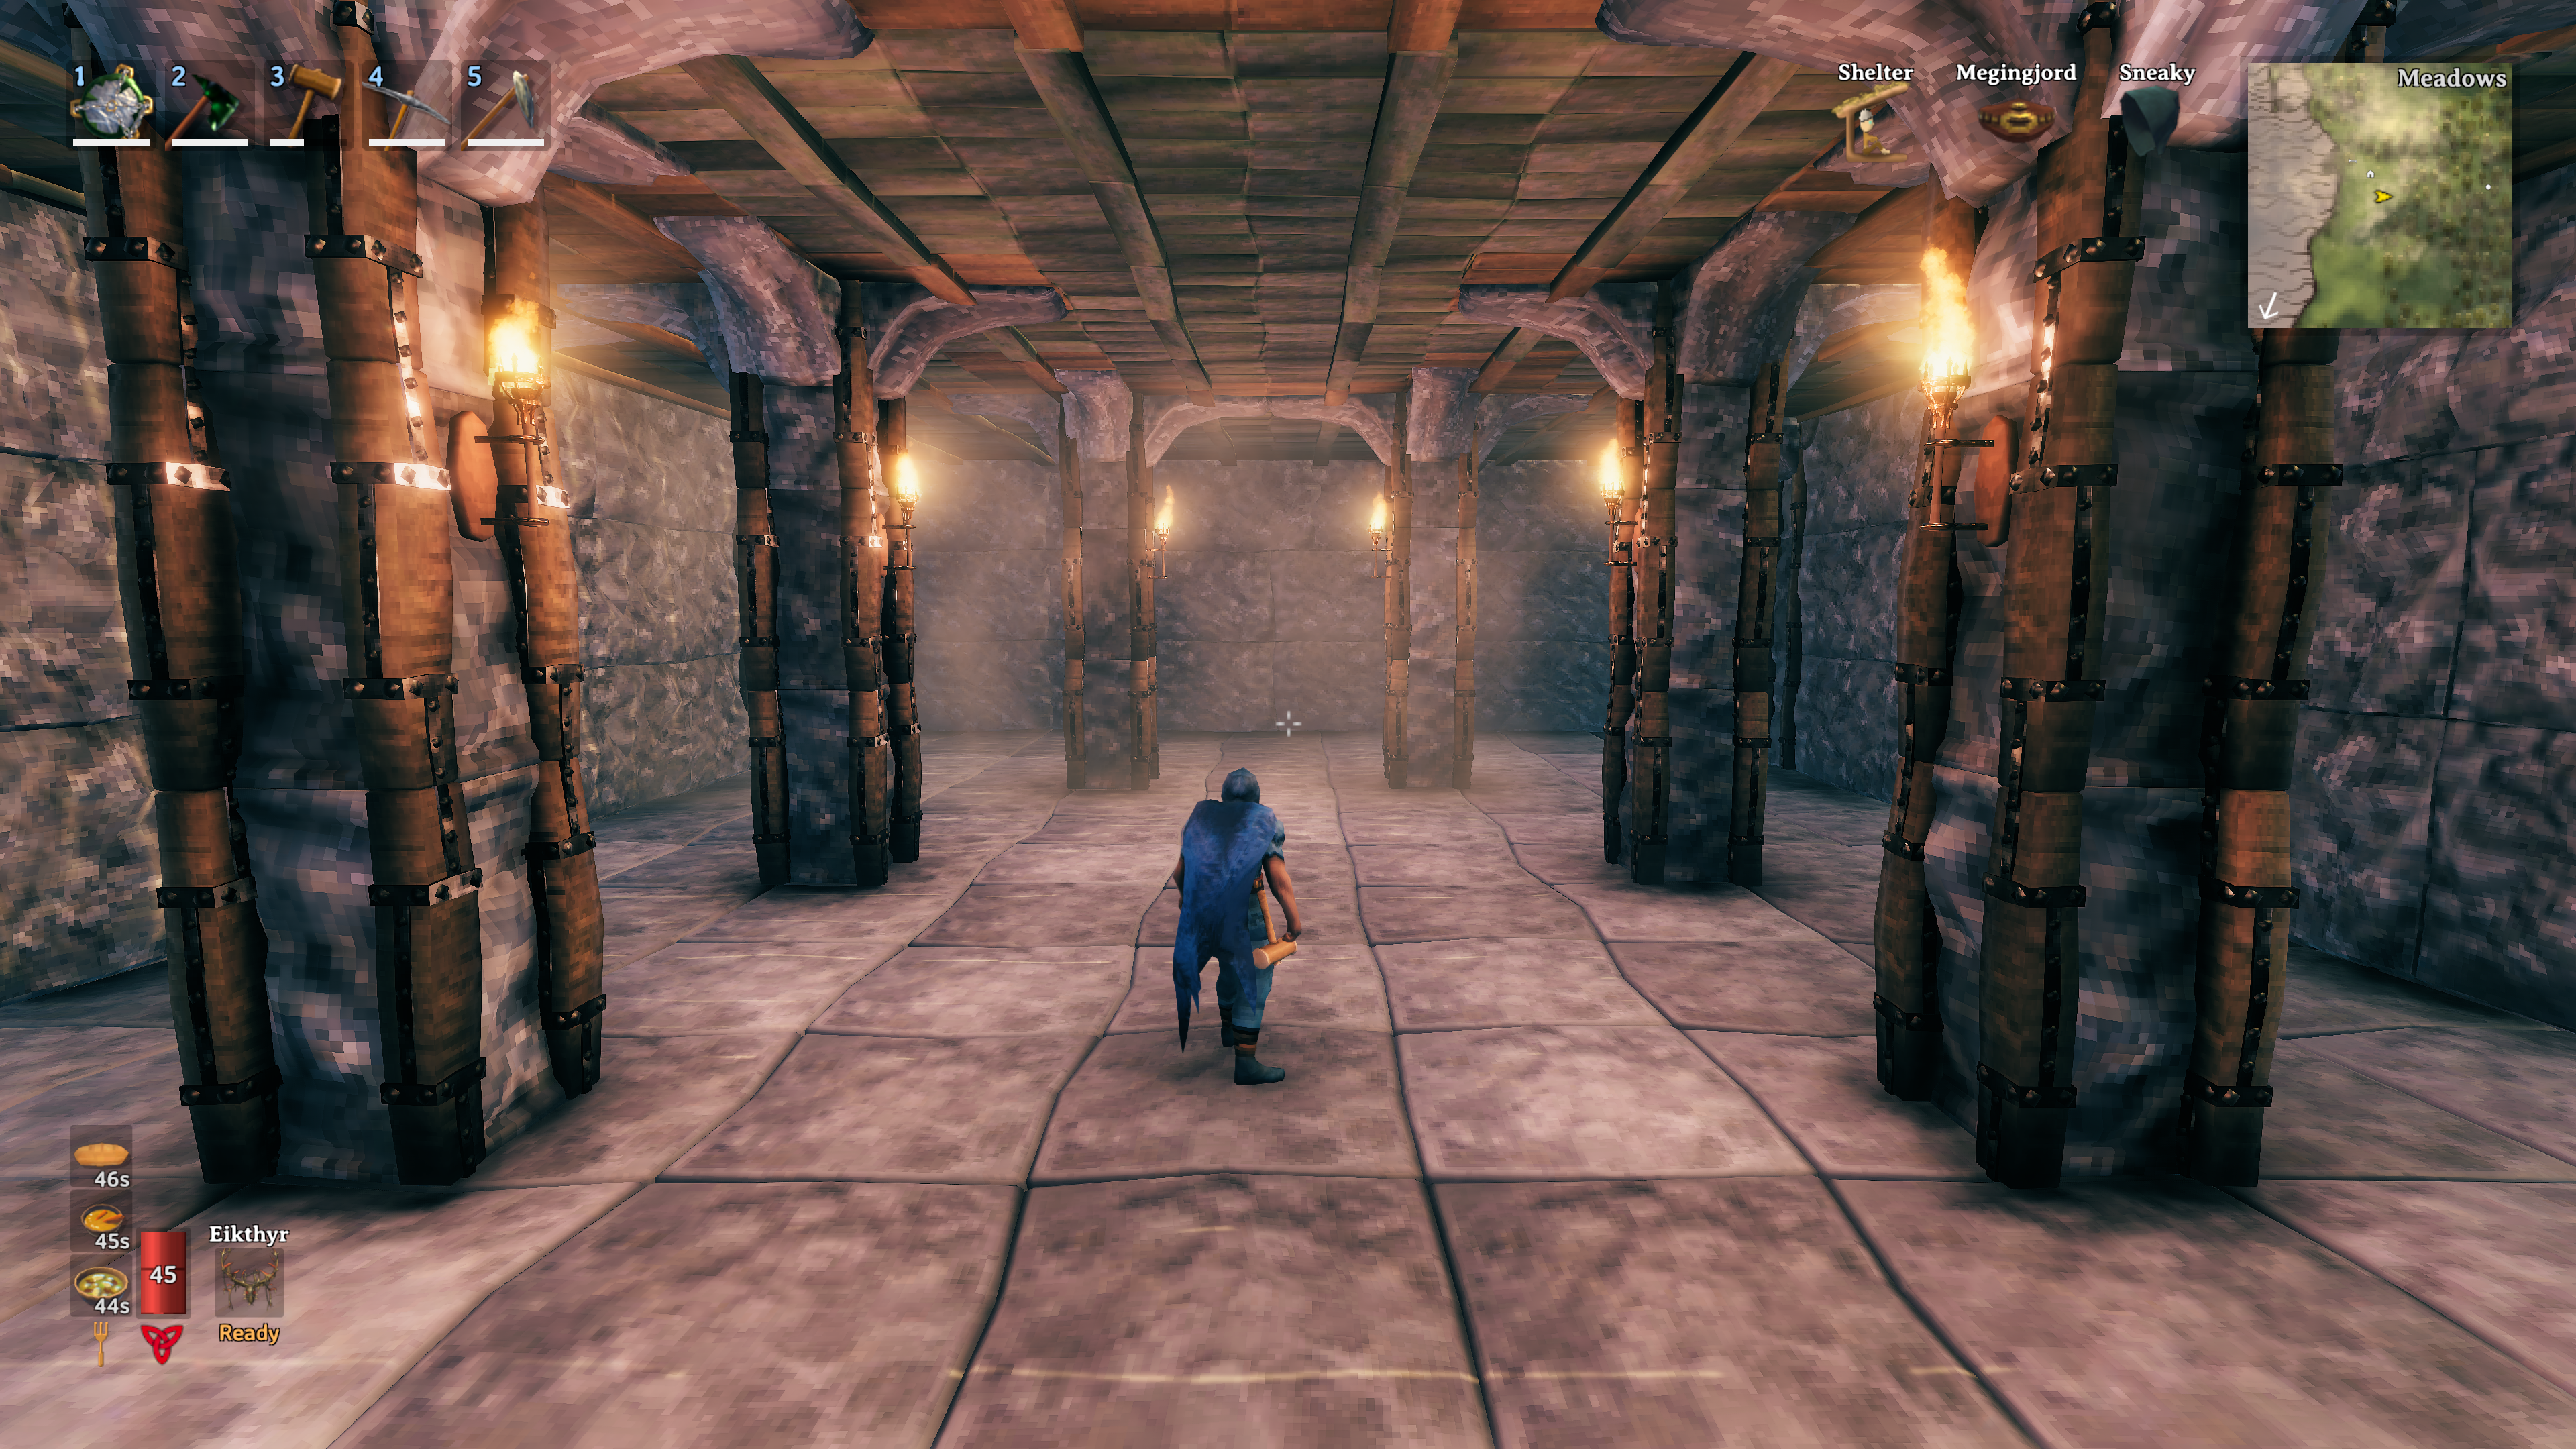
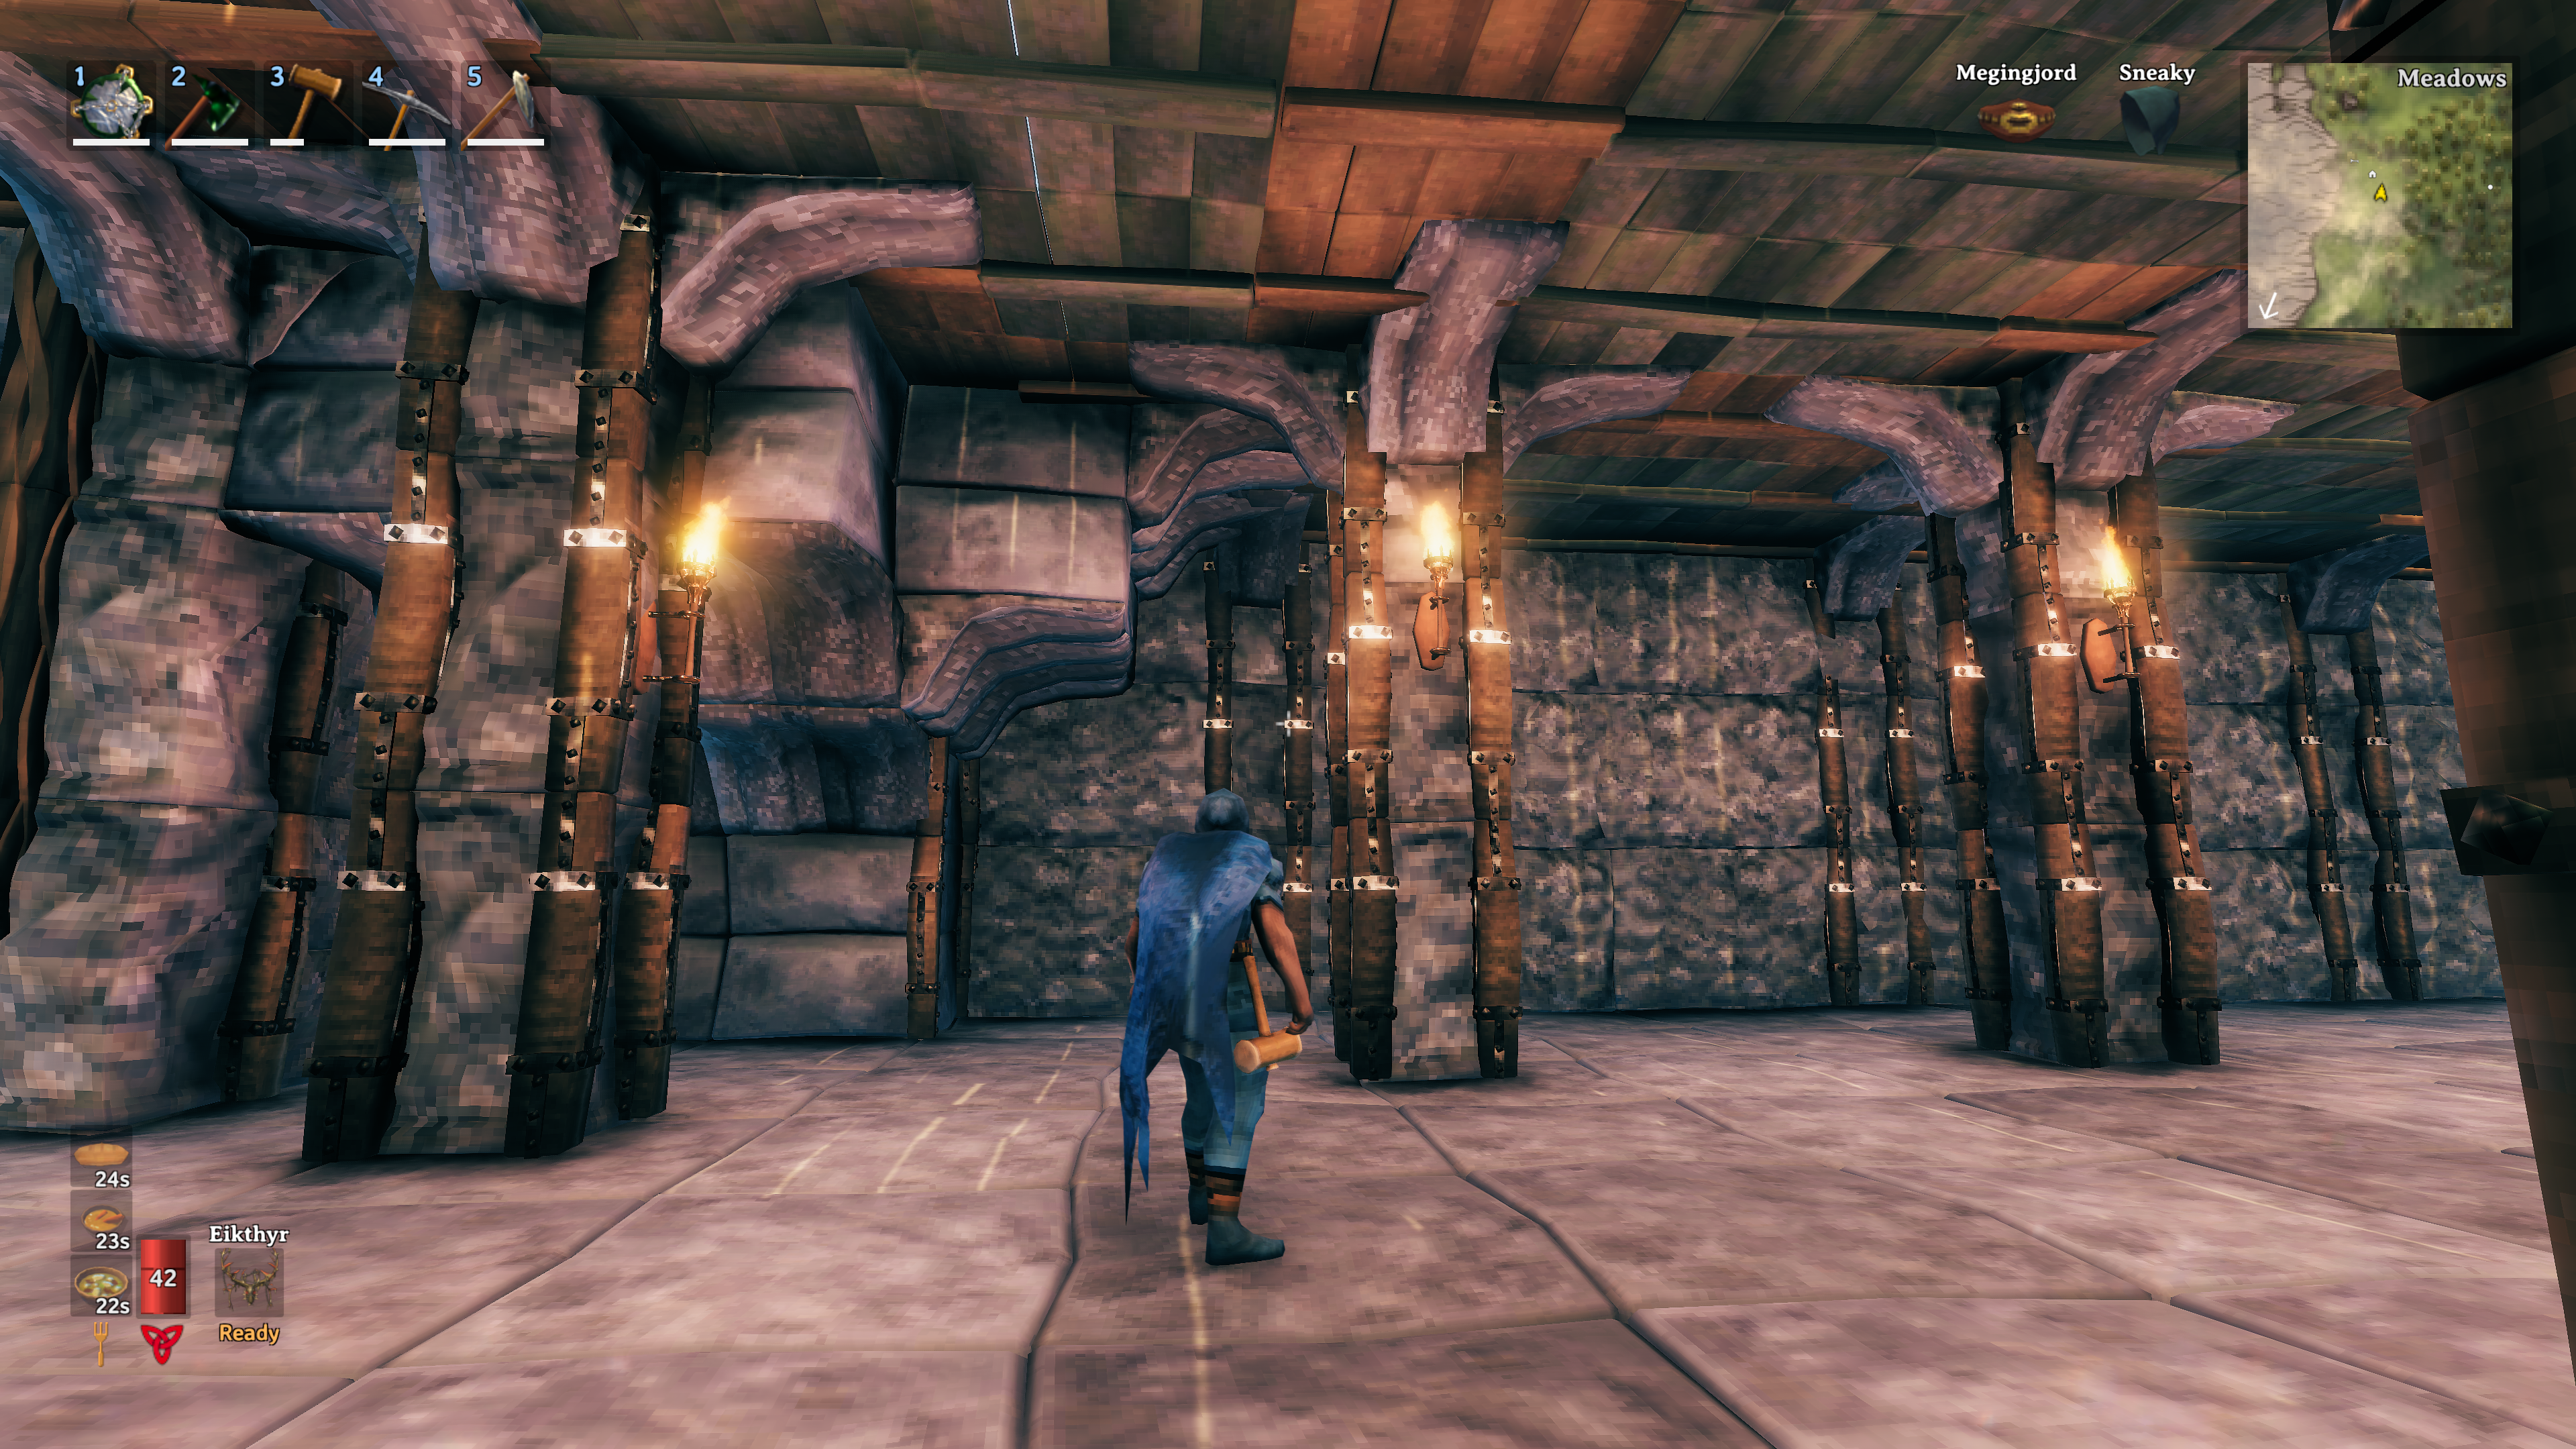
Use Stone Wall 4×2 pieces to fill in the walls all the way around the structure (3 high). This should be pretty straight forward. Add some Sconces to your pillars as seen above to light up your new space. Optionally, you can choose to place Darkwood Poles on top of the Wood Iron Poles on your pillars, but personally I liked the dungeon vibe of the exposed wood and iron.
#9 Build a Cage Match Arena!


Build a platform out of Stone Floor pieces within the confines of the center pillars. Mine is 5×5, with each of the corners removed and replaced with stairs, but you can also choose to extend the platform and cage further if you want more space for your caged skirmishes! Surround the entire platform with Cage Wall 2×2 and 1×1 as needed. Add Iron Gates to either side, or if you have 4 friends for dueling, you can even put in 4 gates – why not! Finish with Stone Stairs and you are ready to move on to step 10. Note that at this stage, I added Stone Arches all around the perimeter of the space.
#10 Build a Door

Add 4×2 Walls to join your two sets of pillars closest to this side of the foundation if you didn’t in the last step. This will give you the beginning of the entry way. Connect Stone Pillars to the corners of those new 4×2 walls and stack them 3 high as you see in the image above. Next, you’ll snap two Darkwood Gates into place the center. For the arch design above, you’ll need two inward facing Darkwood Arches snapped on top of the gate. Then, place 4 Carved Darkwood Dividers along the top, a couple of Sconces and you are all set. Don’t forget to add those Arches atop your inner walls as a finishing touch.
#11 Cage Arena Viewing Window
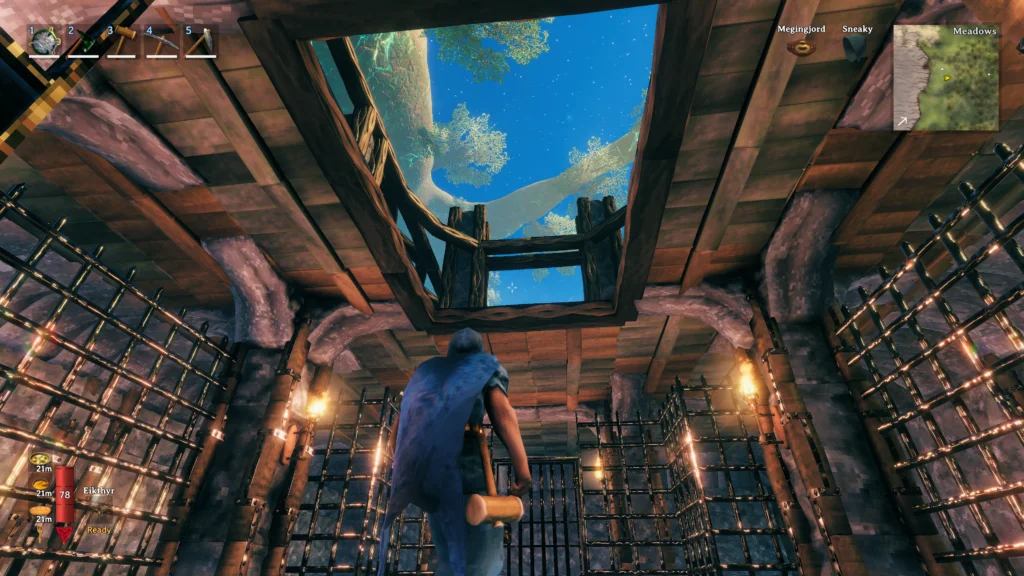
Remember when I said there would be dinner and a show? This is what I meant… Punch a hole in your ceiling above the fighting pit 2×4 Floor pieces large and brace the edges with Darkwood Beams. At this point, you can cover your fighting platform in Lox Pelt Rugs. It really ties the room together, man.
#12 Stair Adornments

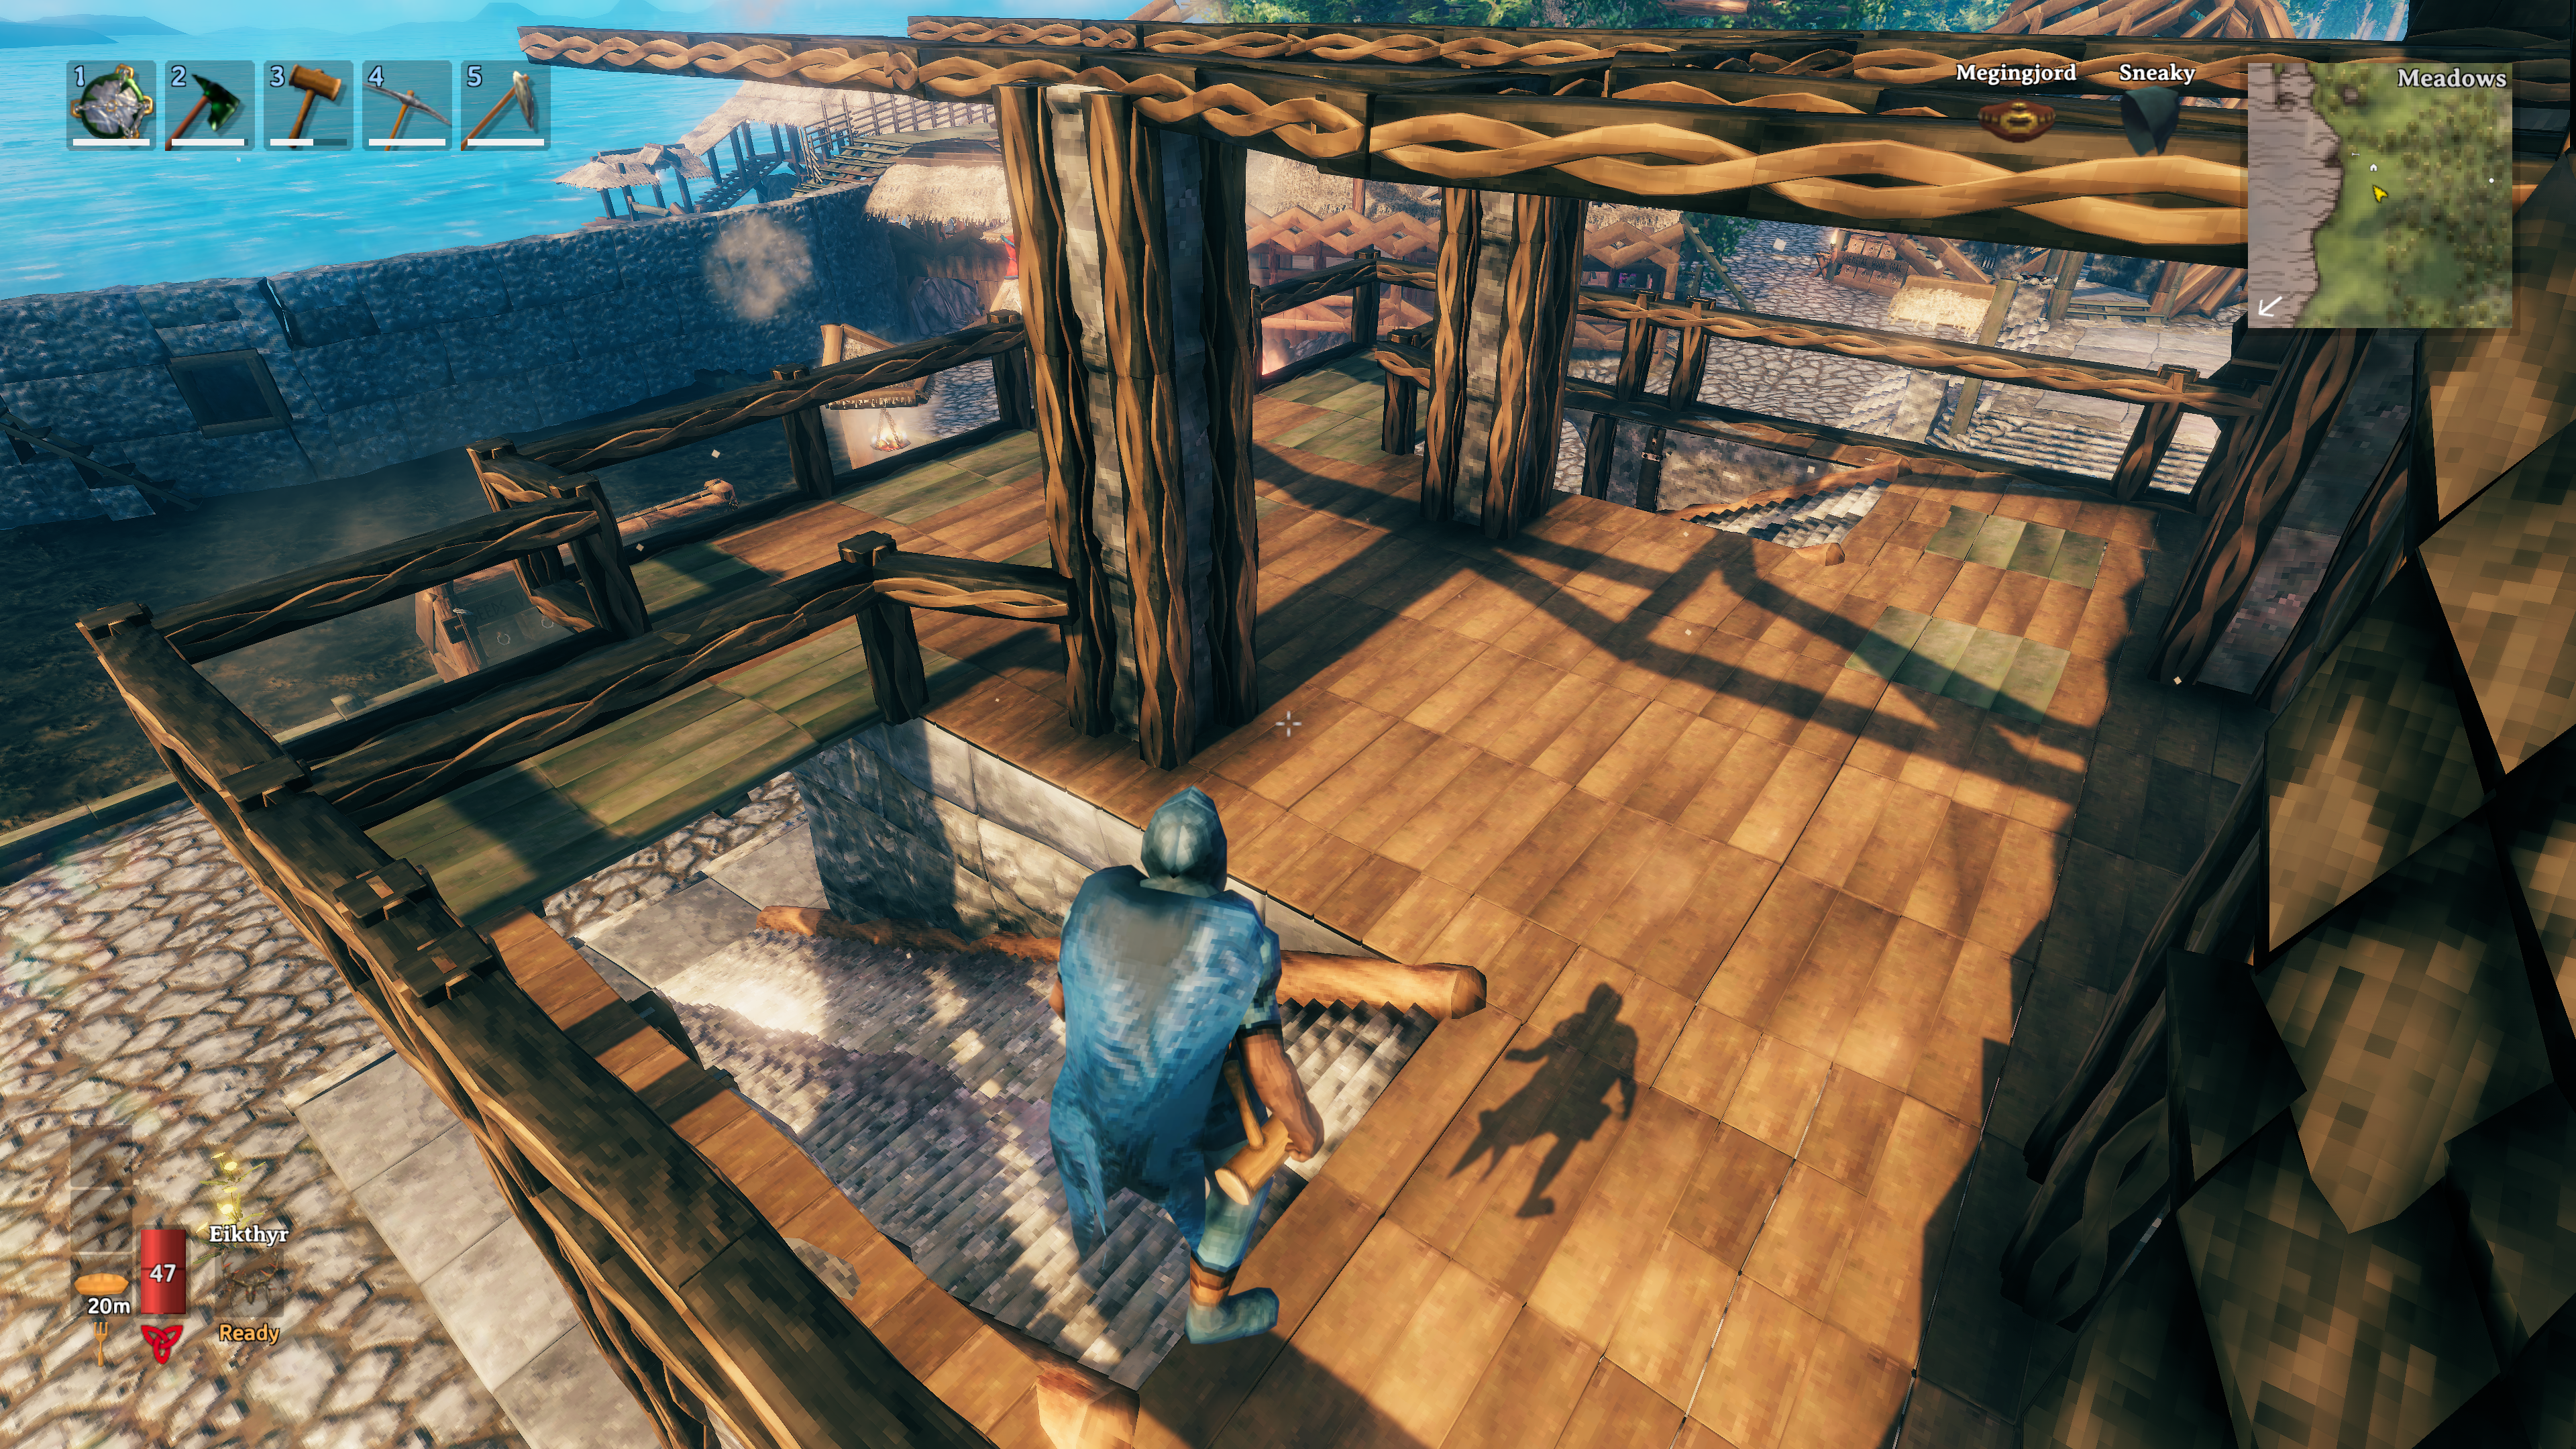
Snap angled Log Beams to the edges of your stairs. Here’s another angle of the top deck in case you’re not sure if you got the shape right. Make sure it’s looking like this before step 13! You can also add stairs to the edges of your stone foundation to blend it with your ground level.
#13 Raise The Roof
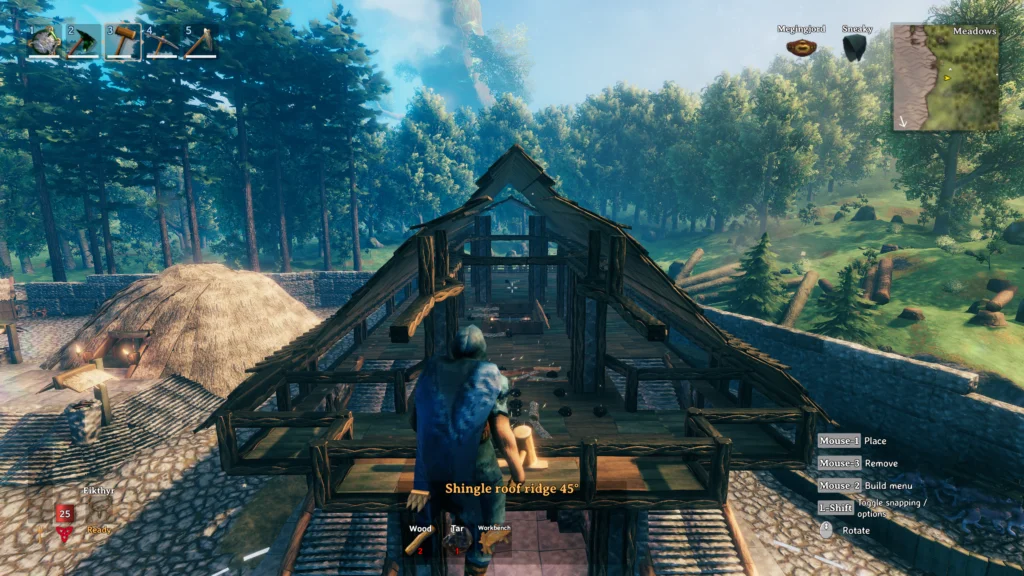
Start at the front-most edge of one of your second floor beams (lower left corner point in this image) and snap the first 45 degree shingle roof piece on to the beam so it is hanging half way over the beam. You may need to zoom into this image to see what I mean. Now once it’s in place, you’ll follow this pattern of roof pieces: 45 degree (first piece) > 26 degree > 45 degree > 45 degree > 26 degree.
You should end up above the middle of the building, at which point you’ll place a 26 degree Shingle Roof Ridge and then go back down the other side in the exact opposite pattern! Zoom out to the POV you see me at in the image above and make sure the pattern looks exactly like mine.
I should point out that the image above has a couple of different roof ridge patterns throughout, don’t worry about that for now, it is for venting smoke but you can worry about that later.
Once you’ve got the pattern set, continue snapping pieces all the way down the length of the home until you’ve filled in the entire roof. This step will take some time.
#14 Perimeter Adornments

Snap Carved Darkwood Dividers all along the outer railing structure of the building as well as the railings around your front stairs.
#15 Rafter Adornments


Add a few finishing touches with Darkwood Poles and Beams in the rafters between the forward-most set of pillars. Above the next set of pillars (in the second image) you can set 45 degree Wood Walls along the inside of the roof and a rectangle of Darkwood Beams and Poles to achieve this archway adornment. Fill it in with Carved Darkwood Dividers and Darkwood Arches for some finishing touches. Repeat this for the rafters above the back pillars.
At this stage, you can also add Wood Half Walls around the perimeter of the cage fight arena viewing hole, capped with 1×1 Cage Walls.
Place Log Beams along the edges of your Roof Ridge pieces, all the way across the roof. I found that I ended up with an unavoidable gap in the Ridged Roof and the roof pieces next to it, so this helped hide that quite well.
#16 Roof Venting and Lighting


Snap some Hanging Braziers into place. At this point, you may want to open up the center section of the roof for ventilation. To do this, just break open a section of the Roof Ridges directly above and just slightly wider than your fighting pit viewing window. Break down one 26 degree roof piece on either side of the opening, and replace them with 45 degree roof pieces, then cap off the new opening with 45 degree Shingle Roof Ridges, and you’re done! Ready for venting.
#17 Exterior Roof Finishings
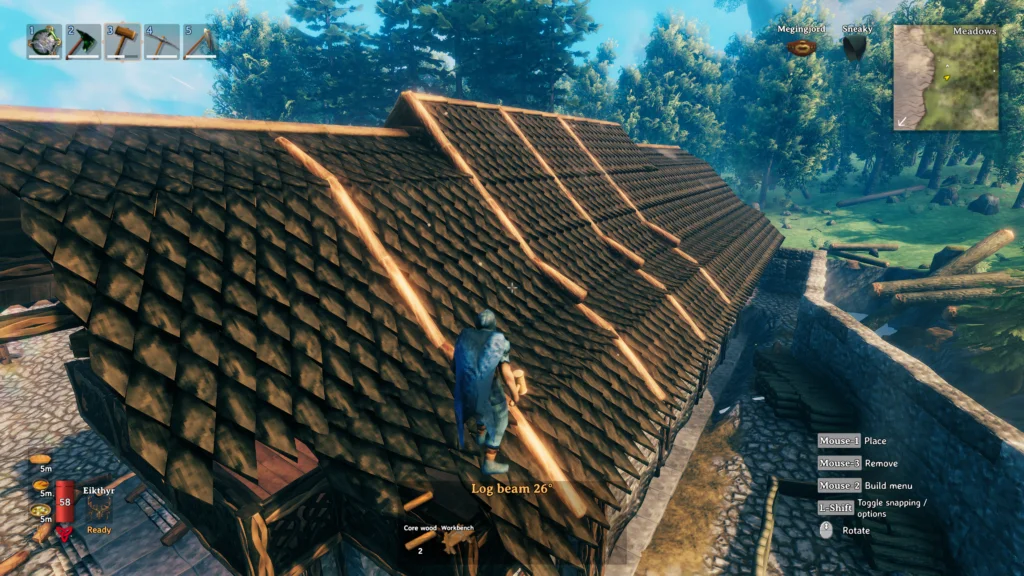
If you haven’t yet, extend your roof out one length of roof past the edge of the front deck. 3 lengths of roof down, cut in one length and then continue down one, then cut in once more before continuing down to the edge of the building, so you end up with this pattern you see here.
Once that is in place, snap angled logs down the sides of the roof, every 3 lengths, repeated all the way across the roof – this will add some much needed texture. As you can see, I snapped on additional angled logs on top of one another at certain sections for even more texture. Optionally, you can snap Wood Dragon Adornments to each of these for extra flare.
#18 The Back Window
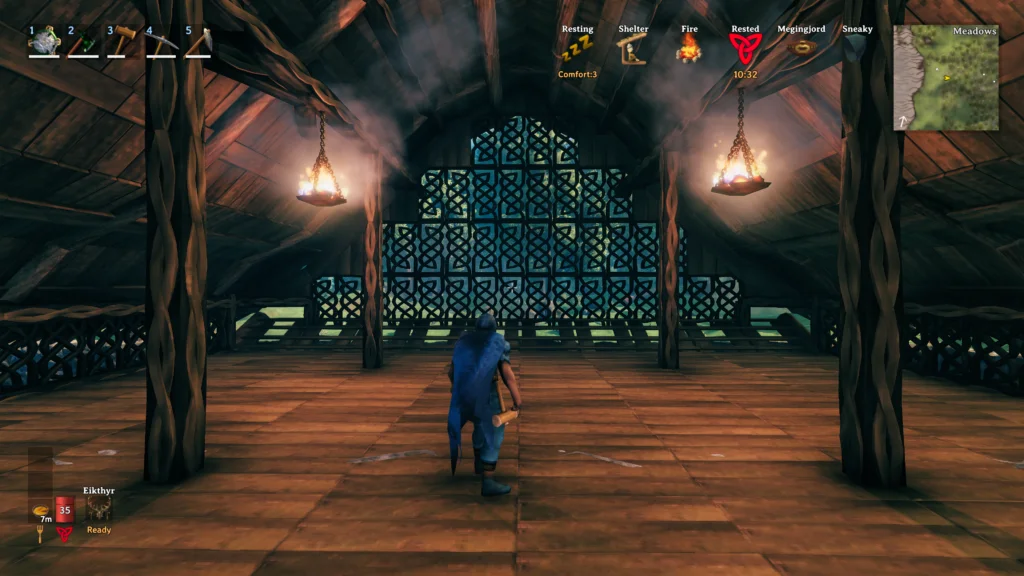
Snap 26 and 45 Degree Wood Walls along the inside of the roof all the way to the top and the same on the other side of the back opening of your Longhouse. At the bottom, you can add Wood Stairs or Half Walls if you prefer to seal off the bottom of the window. In all the open spaces, snap in Carved Darkwood Dividers until it looks something like this!
Now you’re basically done! This big room is where you can put your long tables, thrones, hot tubs, decor, kitchen and whatever Viking furnishings you could want. Sadly, after finishing the build up to this point, my game save corrupted and I lost all 9 hours of work. So I never got as far as furnishing this Epic Viking Longhouse. Decorate as you see fit and comment below your thoughts on the build!
Would you like to see me finish the project, with furnishings and all? Would you want to see a video guide of this process from start to finish? I would love to hear from you, so comment your thoughts and thanks for your hard work.
For Valhalla!